How to Install a Patio or Walkway

Step 1: Stake our your project and excavate
- Lay out your project by marking the area using a tape measure, string line and stakes.
- Use a shovel to excavate the area so it will be 6 inches wider on all sides than the finished project size.
- Remove all organic matter from the area and excavate 6 inches deep for the base, 1 additional inch for screed, plus the thickness of your pavers (usually 2 ⅜ inch).
- Total of ~ 9 ⅜ inch depending on your paver thickness

Step 2: Create a Leveling Pad
- Fill project area up to 3 inches deep with ¼- or ¾-down gravel. Rake it so it’s level. Wet surface lightly with a hose.
- Compact the surface (run a vibratory compactor on top, or hand pack). Repeat process with remaining gravel, including wetting and packing.
- Check the levels. Make sure to allow for positive drainage and add gravel as needed. Compact again.

Step 3: Add Screed Sand
- Temporarily lay two 1-inch pipes, parallel to each other and about 4 feet apart, on the compacted base.
- Spread 1" of paver sand over the base between the pipes. Level the sand by pulling a straight 2 x 4 across the pipes until the sand is smooth.
- Remove one pipe and fill the void with sand. Use a 2-foot level to achieve desired grade. Repeat. Use remaining pipe to set the grade for the next section.
Step 4: Install Next Base (If you have)
- On top of your screed layer install your Next Base Layer. Make sure to offset the Next Base tiles buy half a tile to lock it in together.
- Install all the way to the edges of the screening level. This will give you the ability to walk over the screed level without having to relevel it.

Step 5: Install your Pavers (Without Next Base)
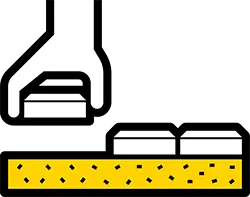
- Without walking on screed sand, start at a 90-degree corner. Lay random pavers to step on if necessary.
- If you’re using a border course, start with those first in a corner, then move on to pattern pavers. Step back, check your pattern, check for squareness and make adjustments.
- Check your work frequently. Lay as many pavers out as space will allow, then mark for cutting.
- Using a quick-cut saw, follow the marks and cut out waste paver material. Install the border course, if you’ve planned for one.

Step 5: Install your Pavers (With Next Base)
- Starting at a 90-degree corner, lay random pavers to step on if necessary.
- If you’re using a border course, start with those first in a corner, then move on to pattern pavers. Step back, check your pattern, check for squareness and make adjustments.
- Check your work frequently. Lay as many pavers out as space will allow, then mark for cutting.
- Using a quick-cut saw, follow the marks and cut out waste paver material. Install the border course, if you’ve planned for one.

Step 6: Install your edge Restraint (edger)
- Place edge restraint around open sides of paving area. Push edger tight against pavers and install spikes in edger slots.

Step 7: Compact & Sweep
- Compact your pavers to prevent uneven sinking settling.
- once completely dry, fill the gaps between the pavers with polymeric sand. Make sure there is no more sand on top of the pavers then mist the patio with water to activate the polymeric sand. This glues the patio together to prevent unwanted shifting in the pavers.

Step 8: Backfill Around Your project
- Finish project by backfilling with topsoil around edged areas.
No-Cut DIY Patio Packages
First-time patio installer? Introducing No-Cut DIY Patio Packages—everything you need in one purchase, with free Winnipeg shipping. We provide expert advice for a successful project!
